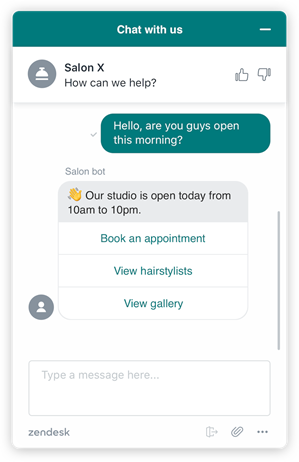
How to create a chatbot with Zendesk Chat Conversations API?
A chatbot is aimed to reduce human intervention by responding to the FAQs- general or specific to any domain(payment, Easter eggs, Hotel reservation, Marvel, DC etc.) 24/7, through channels like Slack, Hangouts, SMS, a website and others. Here, we will embed Zendesk’s UI(widget) which provides us an easy way to embed chatbots in our websites.

Zendesk brings in customer engagement, has quickly configurable chat services, is easy to use, and it scales well to fit to our needs. It also allows you to leverage their existing UI for the chat widget and even provides an option to modify their UI via Web SDK.
**Although, this post is suitable for mobile browsers, Zendesk supports mobile SDK too.**
Prerequisites:
1. Natural language understanding platform like Amazon Lex, Google’s Dialogflow, RASA. (To be discussed later)
2. Zendesk enterprise account acquisition (or trial)
3. Node.js
Now, we have the needful technology support but how to integrate them? For starters, in this post, we will discuss all about Zendesk. So, let’s begin by configuring the Zendesk account through the following steps-
- Create an account on https://www.zendesk.com/chat/ and buy the enterprise plan. Beginners can use a 14-day trial pack.
- After successful account creation, login to create an API client. The redirect URLs could be as simple as https://localhost:9000/

- Once an API client is created, you will get a client Id and a secret key. Save it!
- Do the authentication using CURL or by typing out the following URL in your browser.
https://www.zopim.com/oauth2/authorizations/new?response_type=token&client_id=<client_id>&scope=read%20write%20chat&subdomain=<subDomain>
You’ll get redirected to this URL. Now, save the access_token. This is very important token for us.
https://<redirect_url>/#access_token=<access_token>&token_type=Bearer&scope=read+write+chat
- Create a department and add appropriate agents.

- Copy the Widget script to embed in an index.html or you website’s main page.
<! — Start of Zendesk Widget script →
<script id=”ze-snippet” src=”https://static.zdassets.com/ekr/snippet.js?key=<key>"> </script>
<! — End of Zendesk Widget script →
- Hurray!!! We are good to launch the widget via that index.html.

❤❤❤❤❤❤❤ Congratulations if you have come this far! ❤❤❤❤❤❤❤Now, if you’ll type a “hi” in the text box, it wouldn’t give you any response(after some time, you might get a Trigger message which you can configure through Triggers menu option). Hence the need of backend — backbone of this structure.
In the backend, we need to use Zendesk’s Chat Conversations API. To use this API, your account must be authenticated via the access token which we had generated in the part 1 of this post.
`mutation($access_token: String!) {
startAgentSession(access_token: $access_token) {
websocket_url
session_id
client_id
}
}`;
This token will then be sent to the CHAT_API_URL= https://chat-api.zopim.com/graphql/request (Makes an HTTP request). If the access_token is correct and the account is active, the endpoint will send a response payload as below with a websocket_url, a sessiond_id and a client_id.
{
  "data": {
    "startAgentSession": {
      "websocket_url":"wss://chat-api.zopim.com/stream/0.1/graphql/8b40lm:9012841289",
      "session_id":"8b40lm",
      "client_id":"9012841289"
    }
  }
}
These values can now be utilized in a web socket request such as— wss://chat-api.zopim.com/stream/0.1/graphql/{session_id}:{client_id} A success will establish a connection with the Zendesk’s web socket.
** A complete working code can be found here. **
Too much to consume? Well, let’s look at the flow.
- First off, send a message to the chatbot. This activity of sending the message establishes a channel between the user/visitor and the Zendesk bot(API client created in part1). Every channel is assigned a unique channel id.

- During this process, a listener will listen to the activities on the widget such as “open” and “message”. As the chat opens and the message is sent, Zendesk’s web socket connection will call handleOpen(). There, it will send a request in a graphql schema- mutation/query/subscription.

- Subscription is meant for message send/receive for a particular request_id which you can define in your application. If the message request is successful, we can listen to that Id, in the handleMessage().
webSocket.on('message', function(message) {
  const data = JSON.parse(message);
  let messageSubscriptionId;

  // Listen to successful message subscription request
  if (data.id === REQUEST_ID.MESSAGE_SUBSCRIPTION) {
    messageSubscriptionId = data.payload.data.subscription_id;
  }
});- To receive the response, from bot to visitor, we first listen to the visitor’s message, then to the same channel id, send “Welcome visitor!” and that involves another web socket request. For the customized message you can either use a JSON or NLP.
// Listen to chat messages from the visitor
  if (
    data.sig === 'DATA' &&
    data.subscription_id === messageSubscriptionId &&
    data.payload.data
  ) {
    const chatMessage = data.payload.data.message.node;
    const sender = chatMessage.from;

    if (sender.__typename === TYPE.VISITOR) {
      console.log(
        `[message] Received: '${chatMessage.content}' from: '${
          sender.display_name
        }'`
      );

      const sendMessageQuery = {
        payload: {
          query: `mutation {
            sendMessage(channel_id: "${chatMessage.channel.id}",
msg: "Welcome visitor!") {
              success
            }
          }`
        },
        type: 'request',
        id: REQUEST_ID.SEND_MESSAGE
      };

      webSocket.send(JSON.stringify(sendMessageQuery));
}- Voila! You have created a chatbot successfully.

Button Templates-
For different button templates, you can refer — https://support.zendesk.com/hc/en-us/articles/360022184394-Using-structured-messages-in-Zendesk-Chat
Tips-
- Use live agent functionality for a better user experience(Ux).
- Keep status of the API client as Online/Away.
- Make your code modular.
This is my first post on Medium, let me know your opinion in the comment section below. Thanks for Reading! ❤ #CodeEveryday
